Carrigan Painting
716-697-3560
Learn about Plaster Repair and/or Drywall Repair from a local expert.
We also paint most of our repair work.
In 2023 about 80% of our work was plaster & drywall repair related.
Scroll down for a small sample of our plaster repair work in the Buffalo suburbs.
We do not work in the City of Buffalo
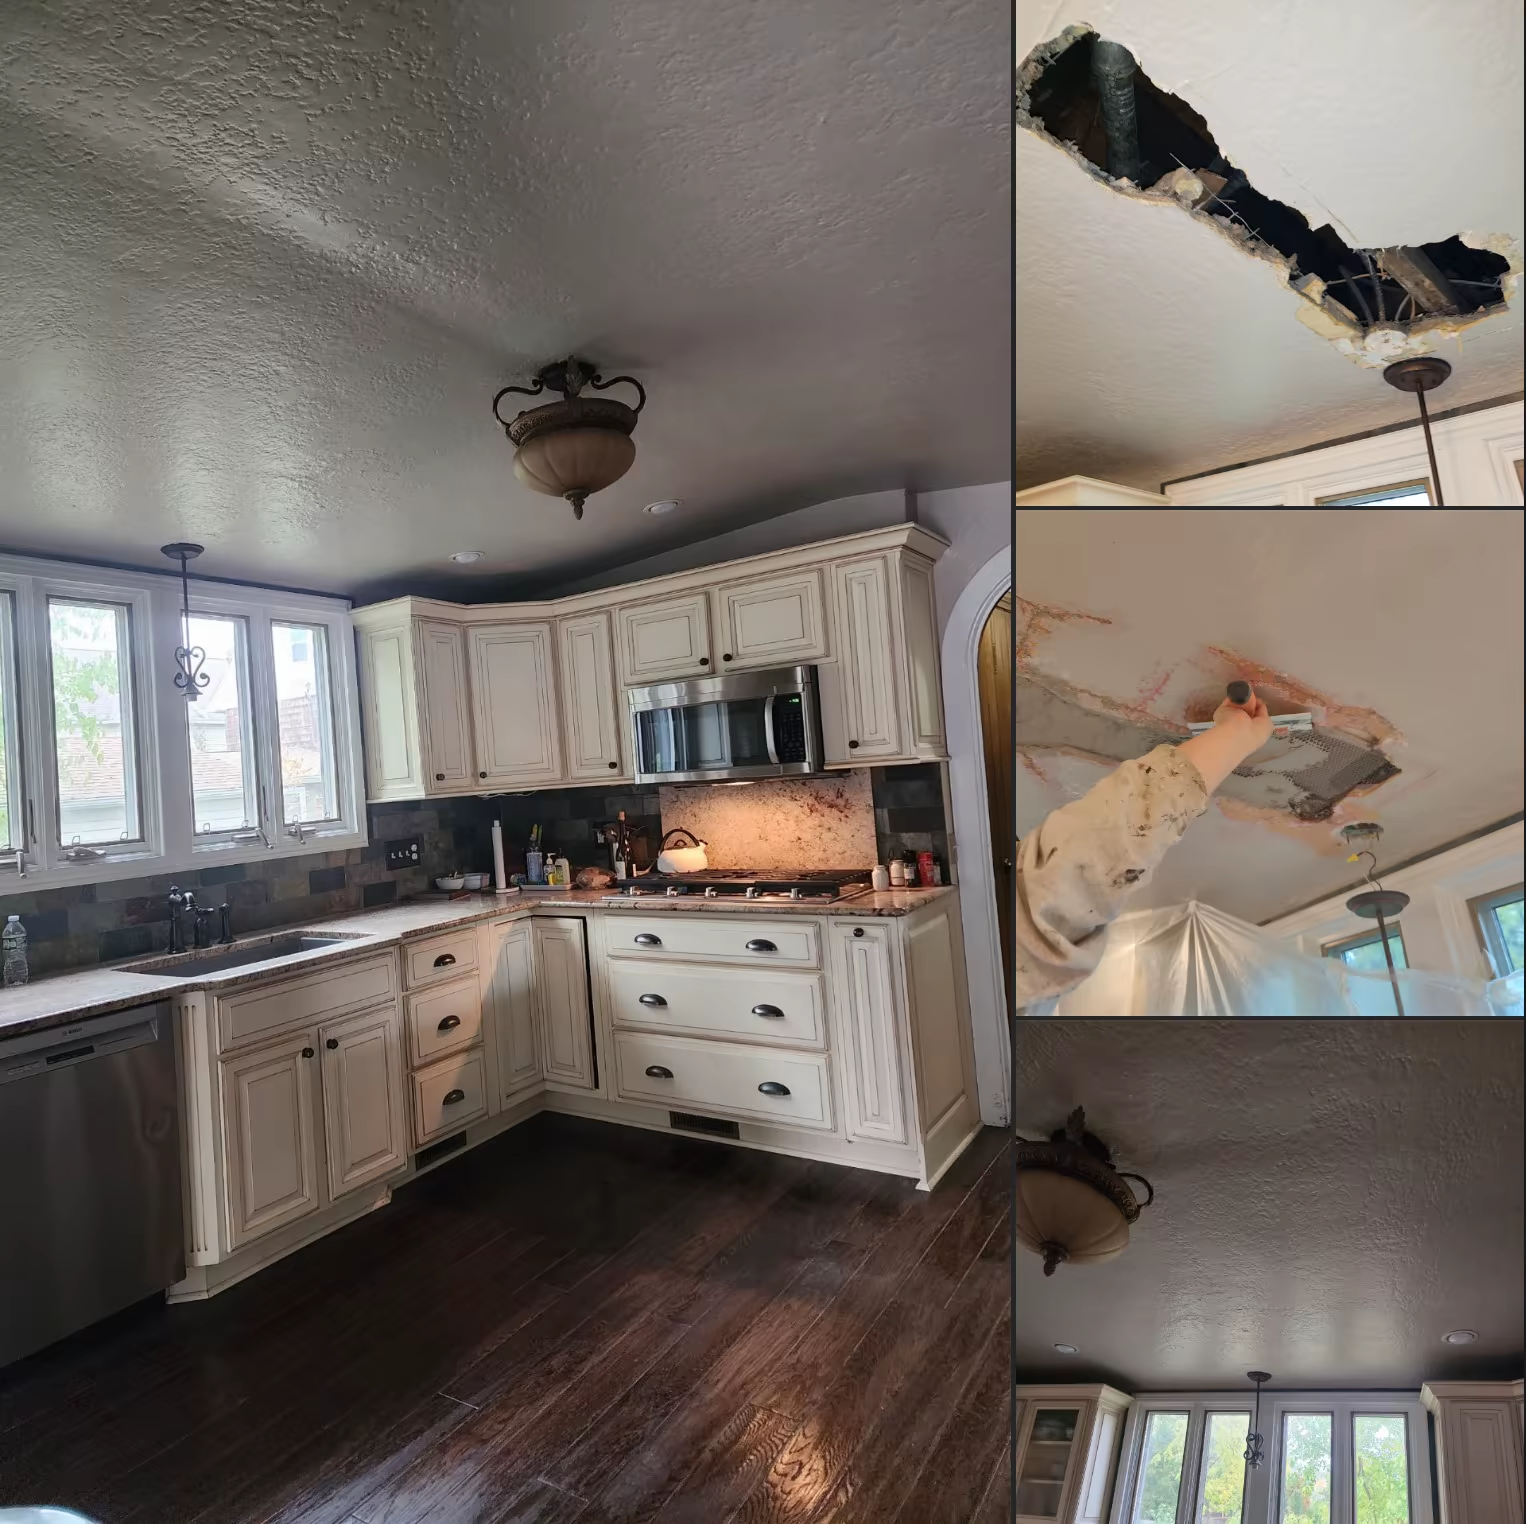
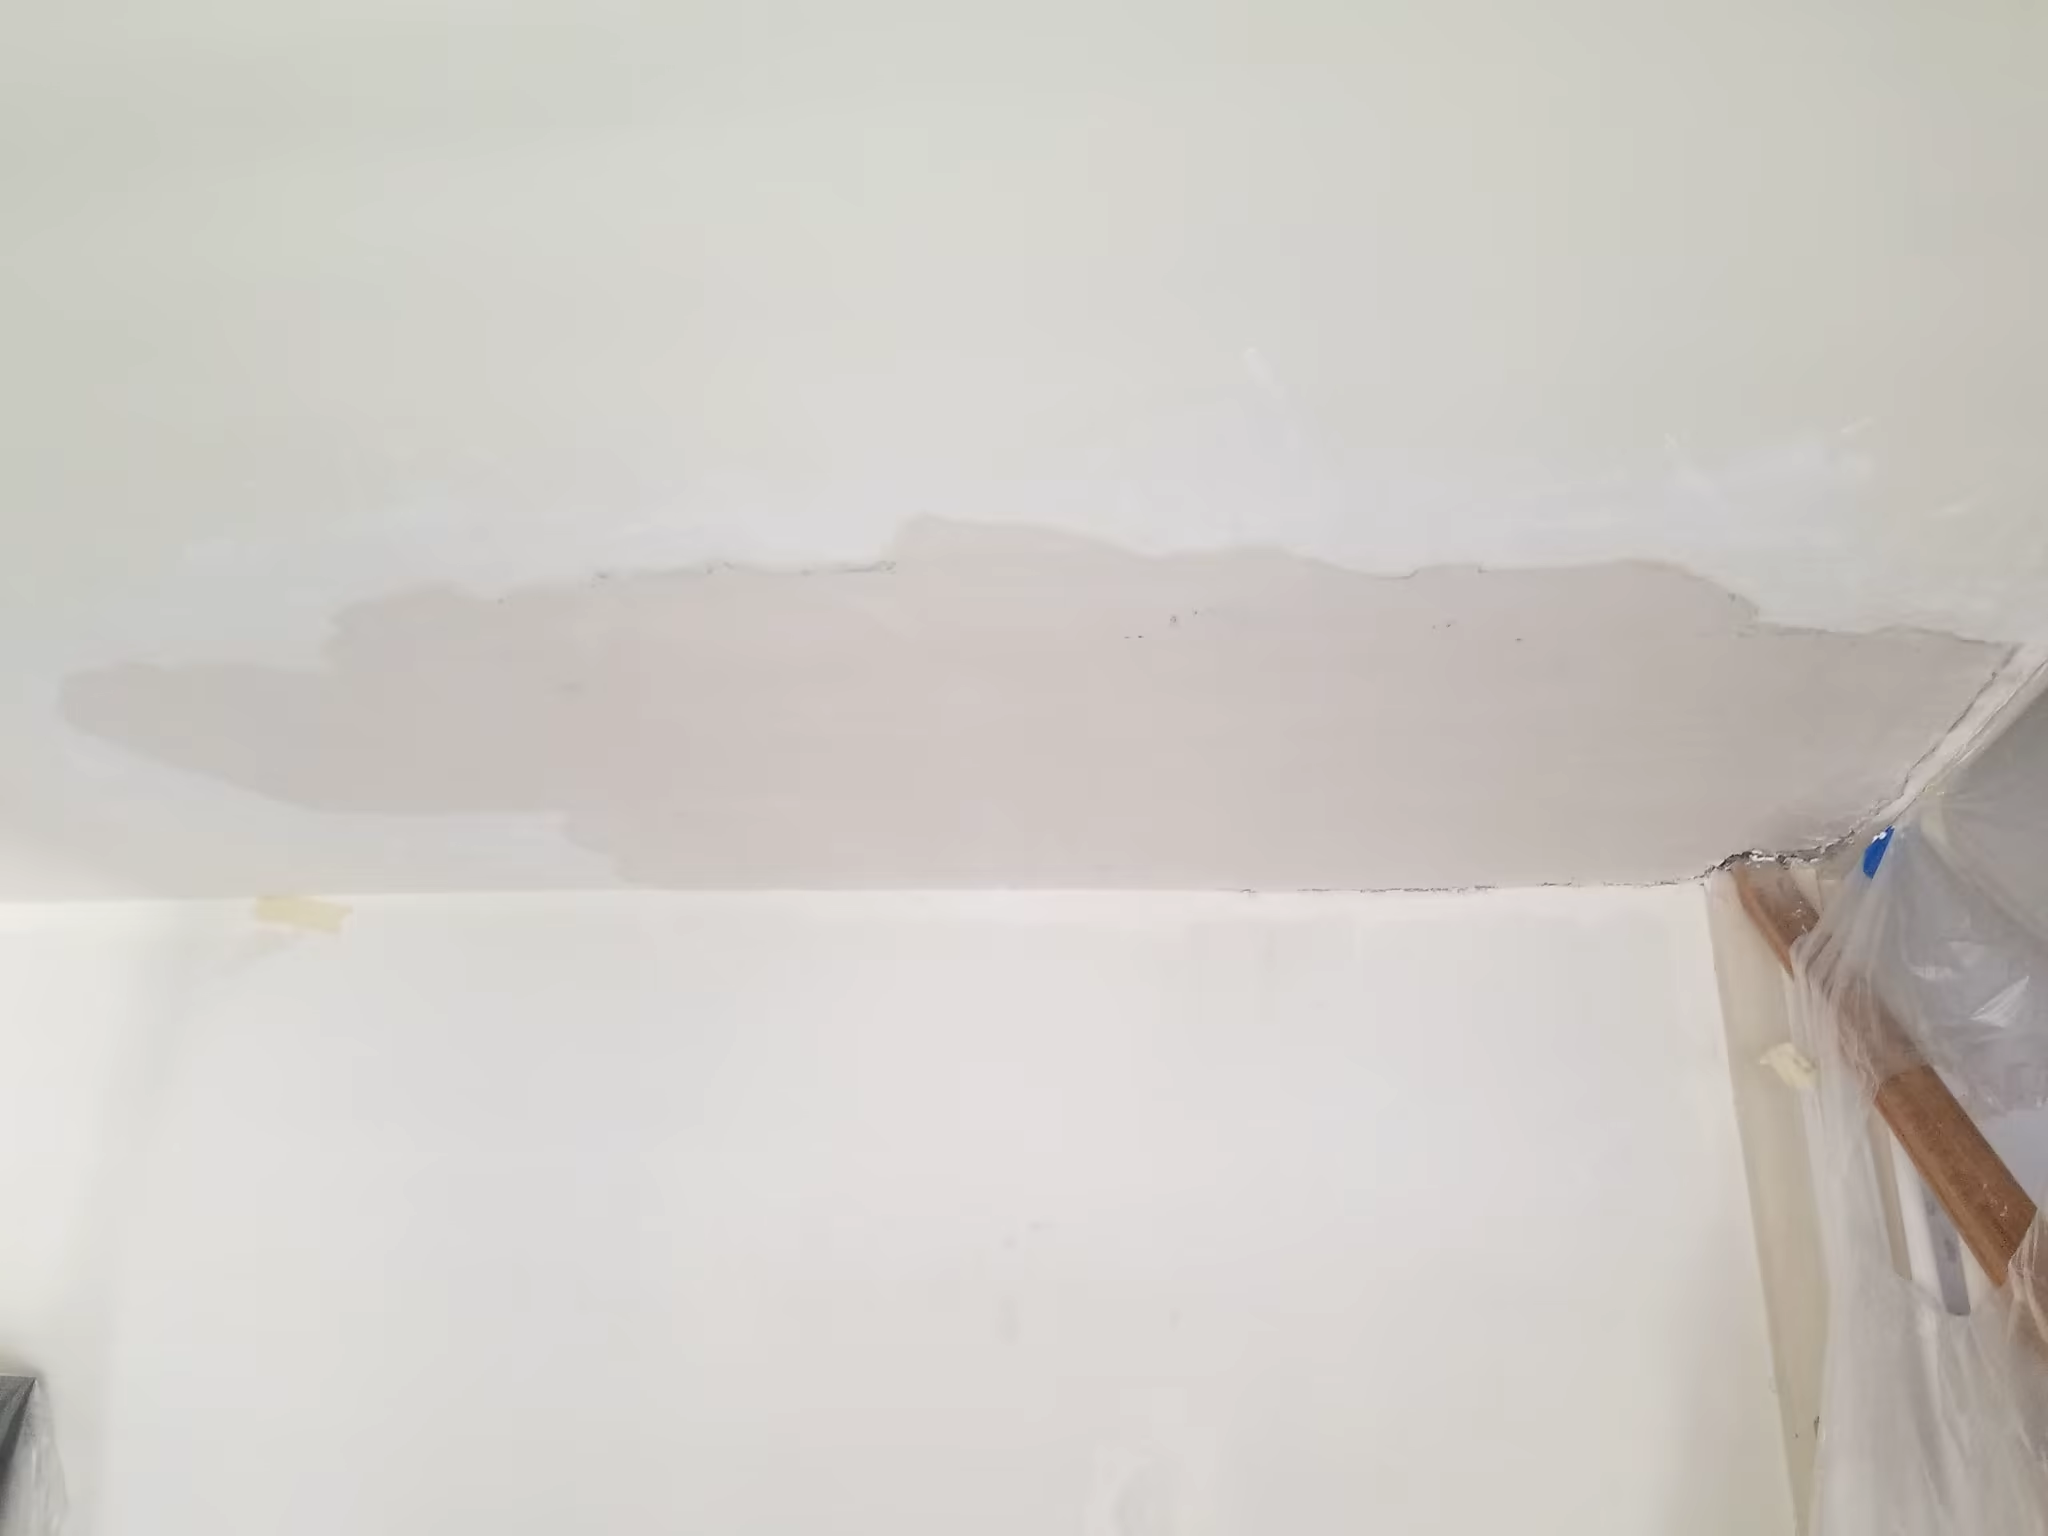
Plaster ceiling damage from a plumbing leak, with custom texture. We repaired the hole with real plaster, and painted the ceiling
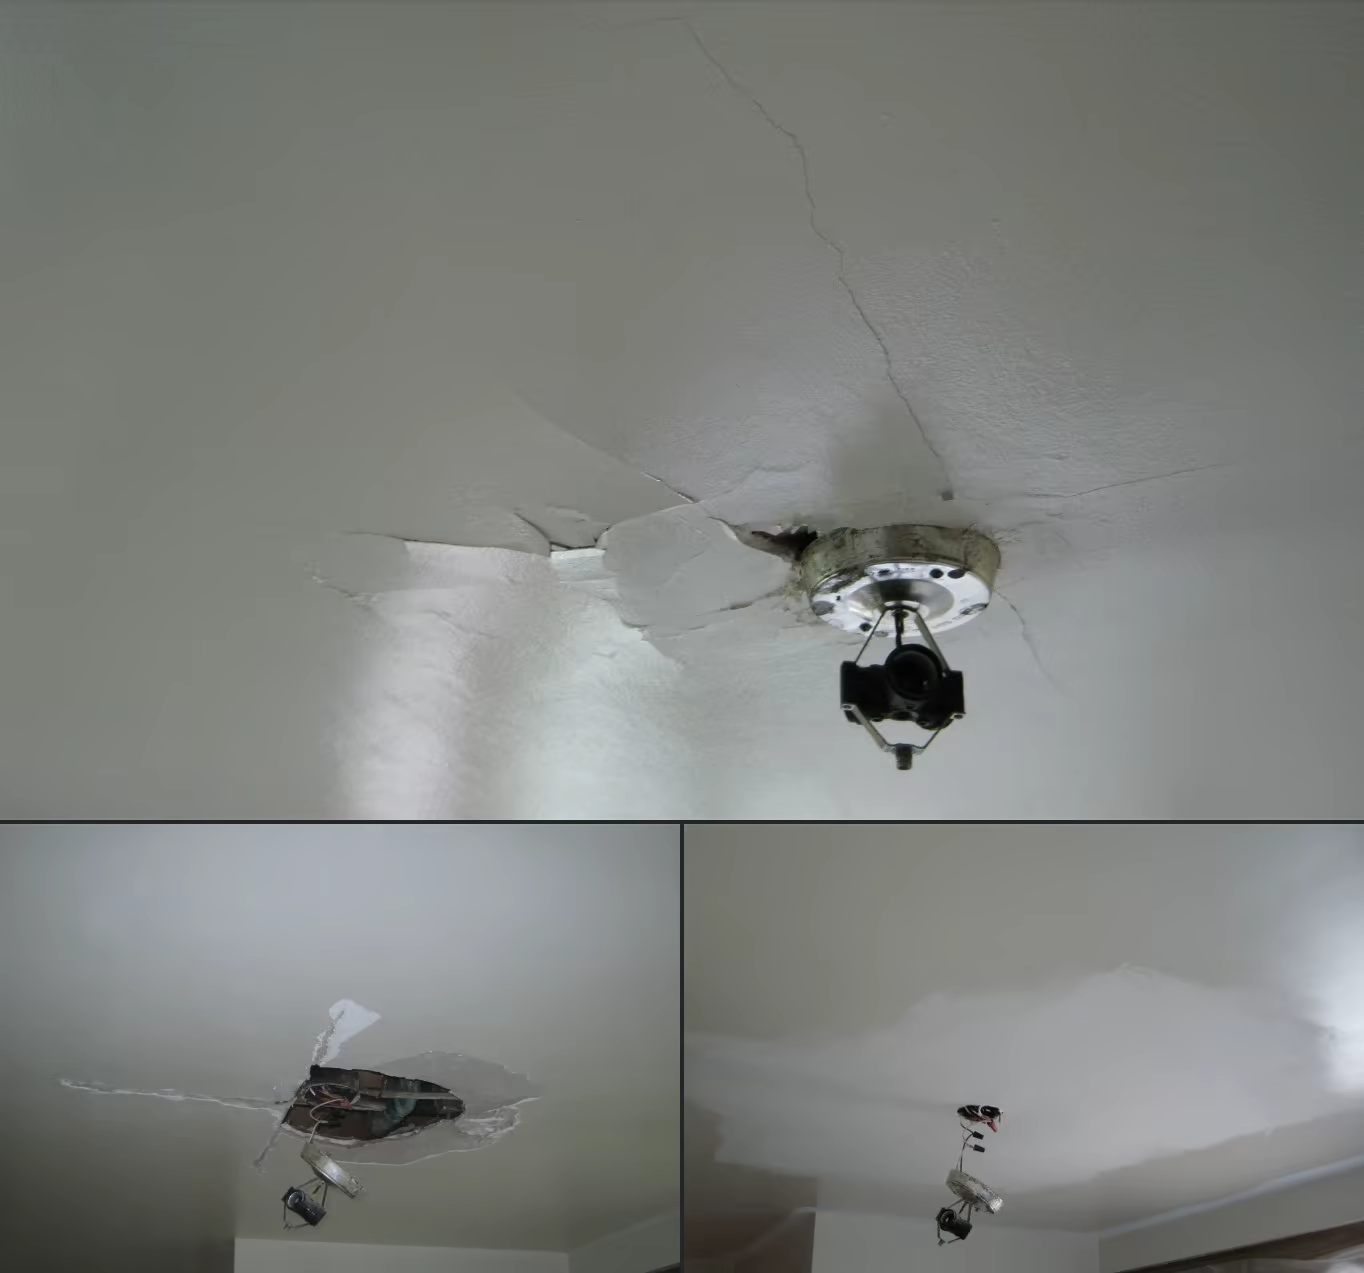
This plaster ceiling was damaged by heat from the kitchen light. The previous homeowner likely used 2, 60-100+ watt light bulbs in the light fixture and literally baked the plaster finish coat off the ceiling.
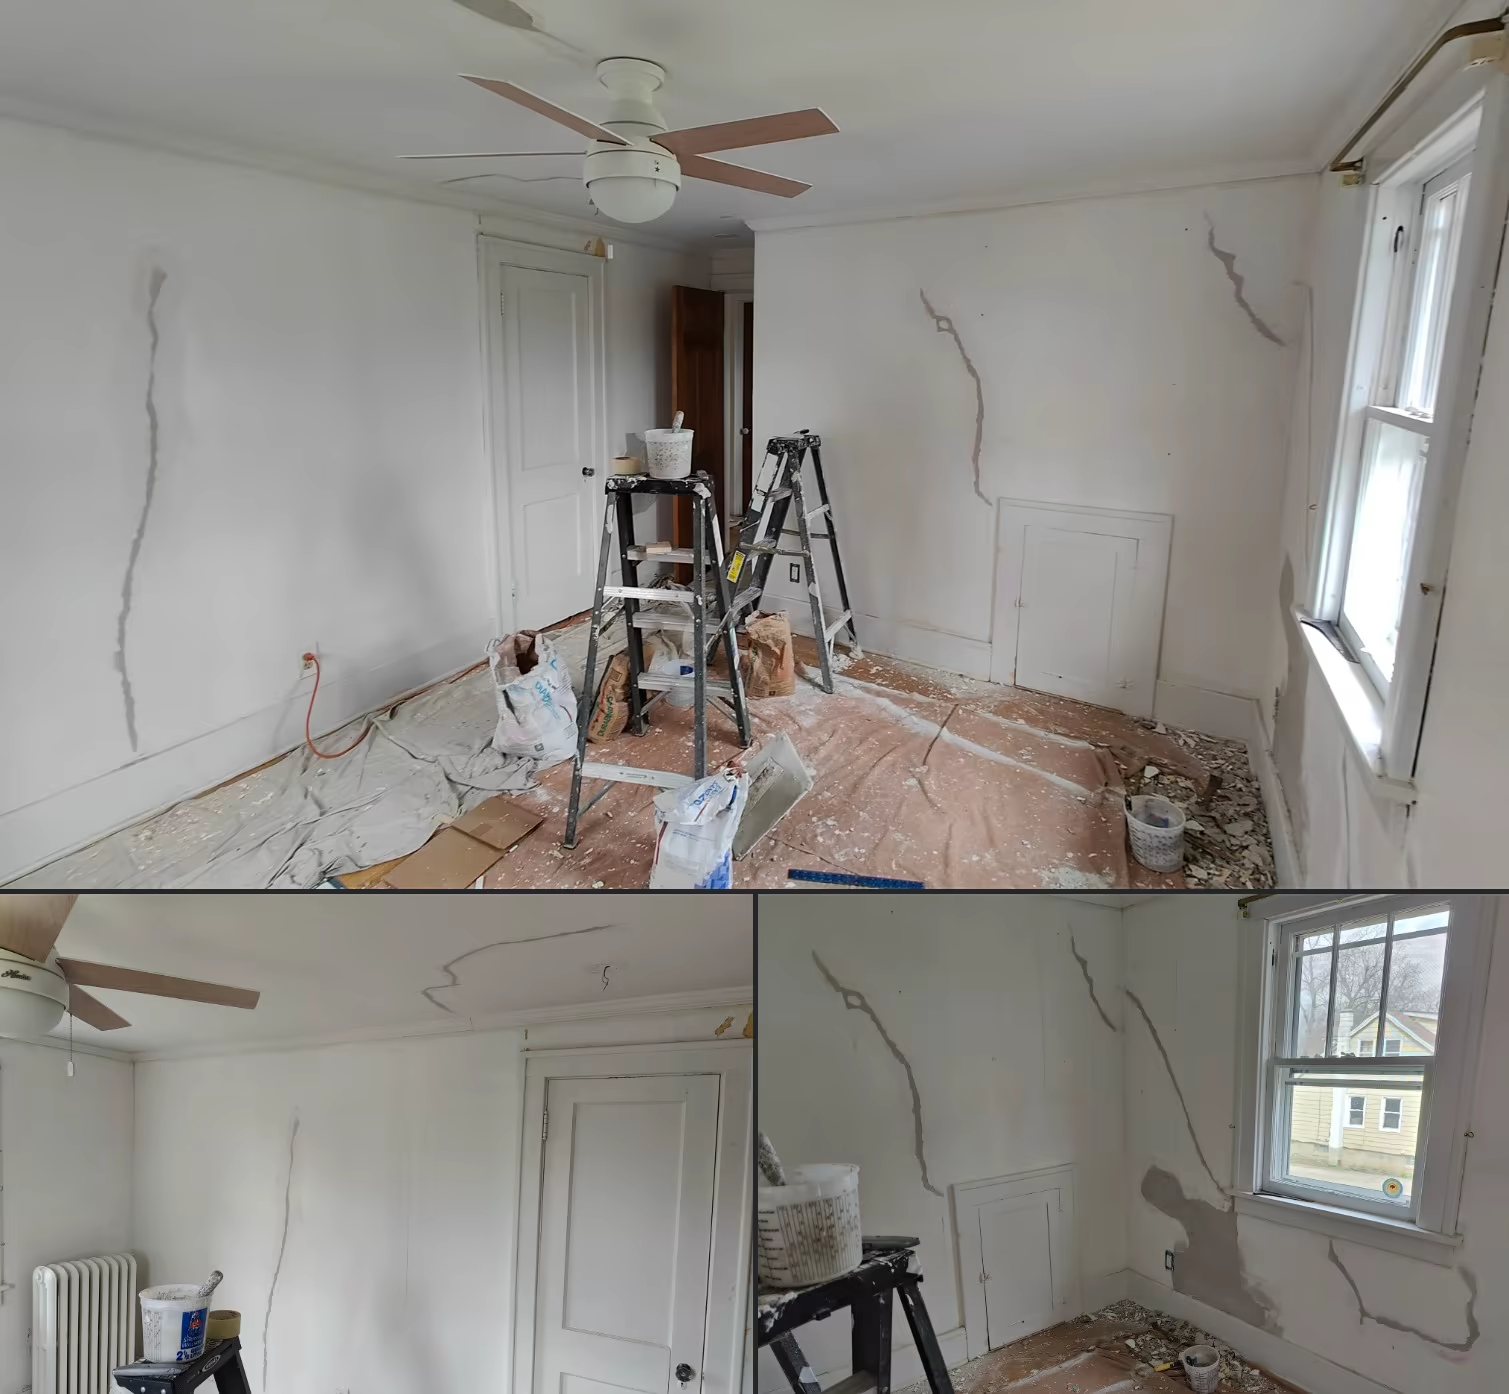
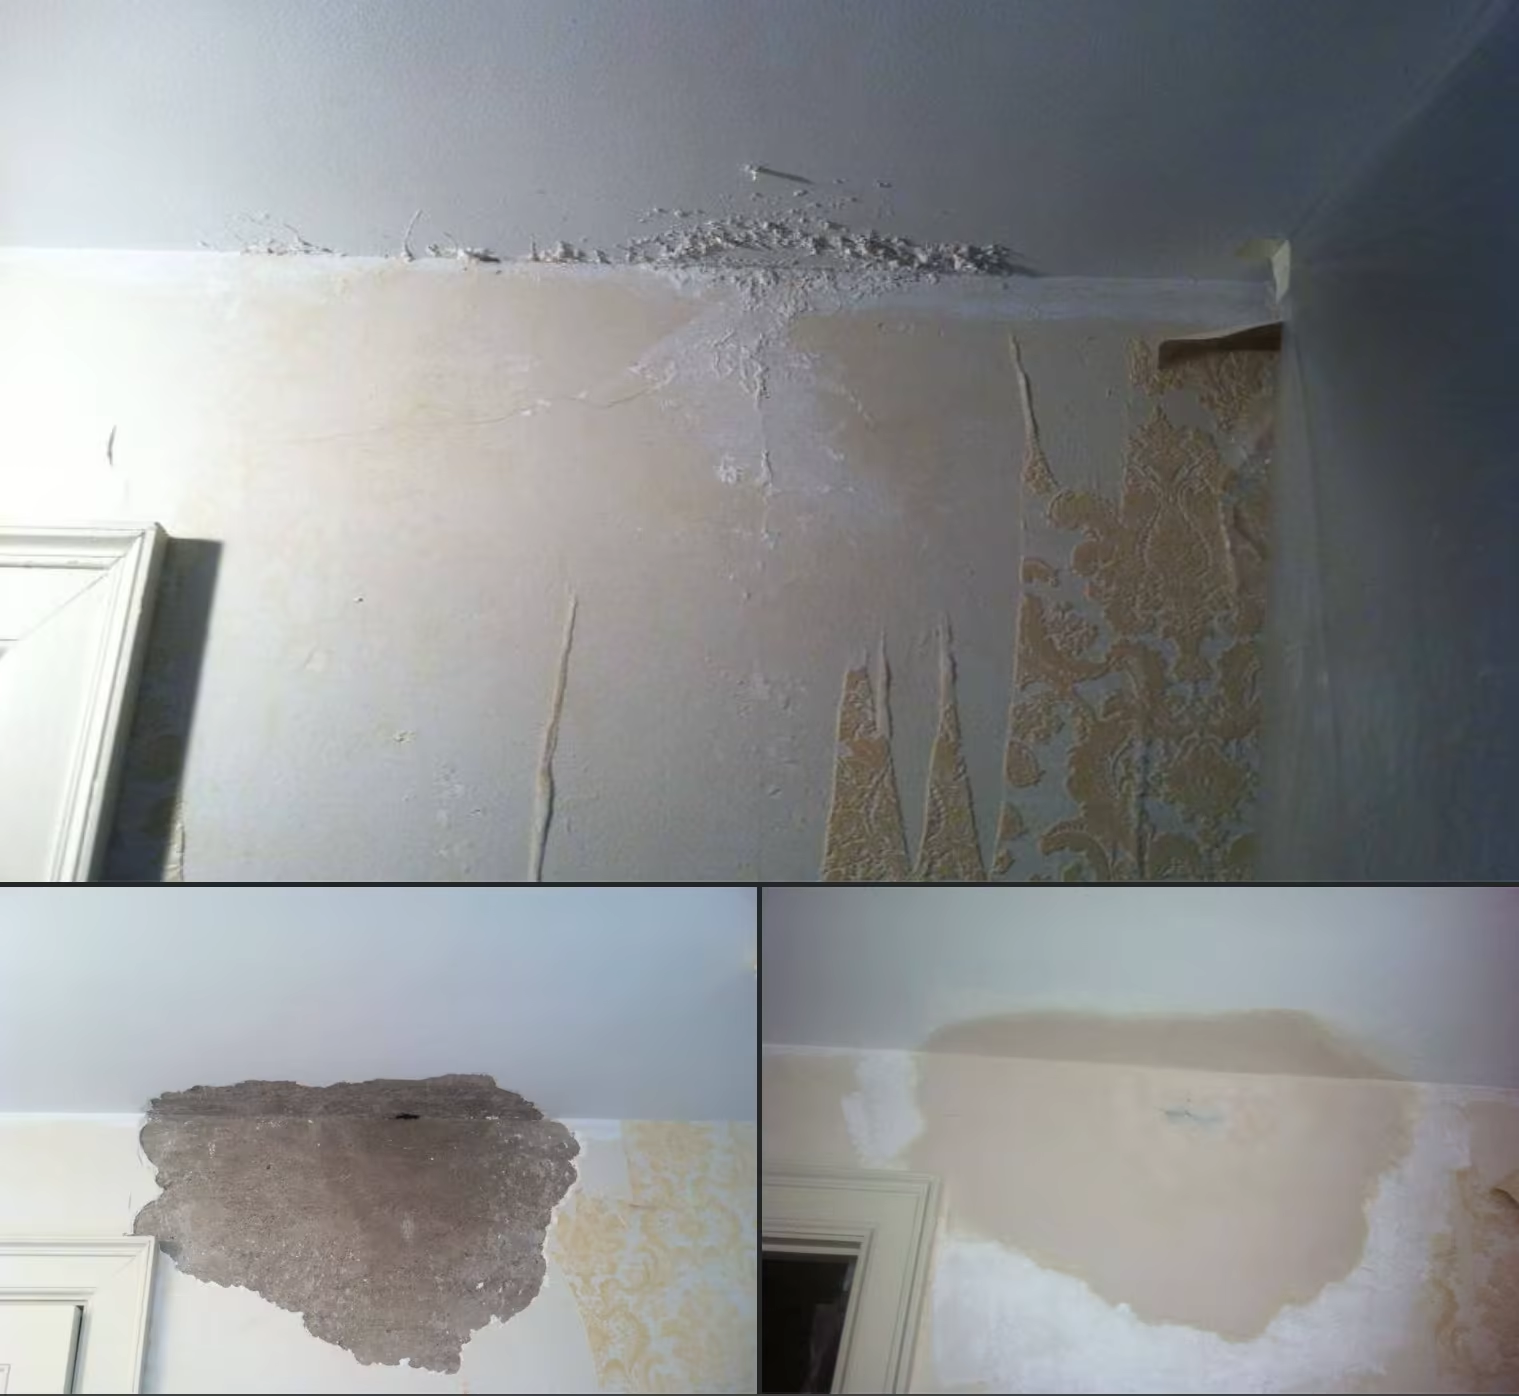
This home had a bunch of cracks in the plaster walls and ceiling. We chipped out the cracks with a hatchet to give the new plaster more to 'key' into. With plaster repair, you only apply material to the damaged area. Plaster shrinks very little so there is no need to build it up. When you run your finger over the joint between the existing surface and the plaster patch there should be no bump.
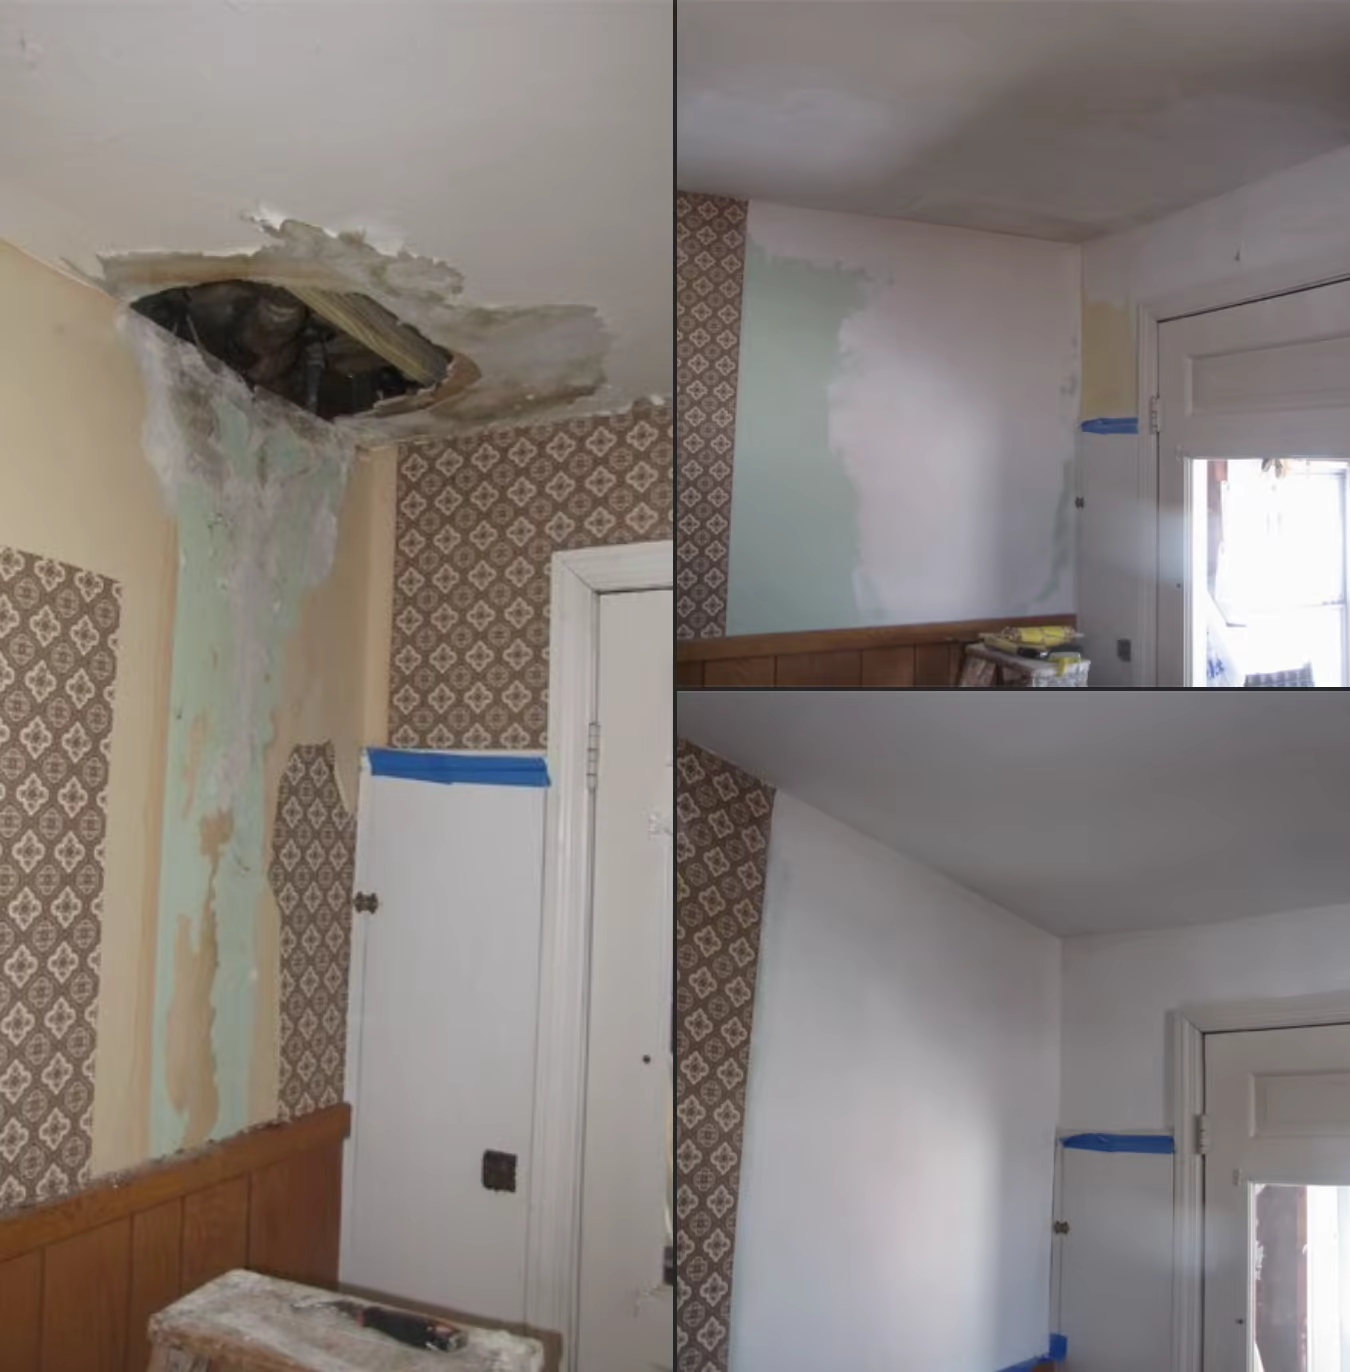
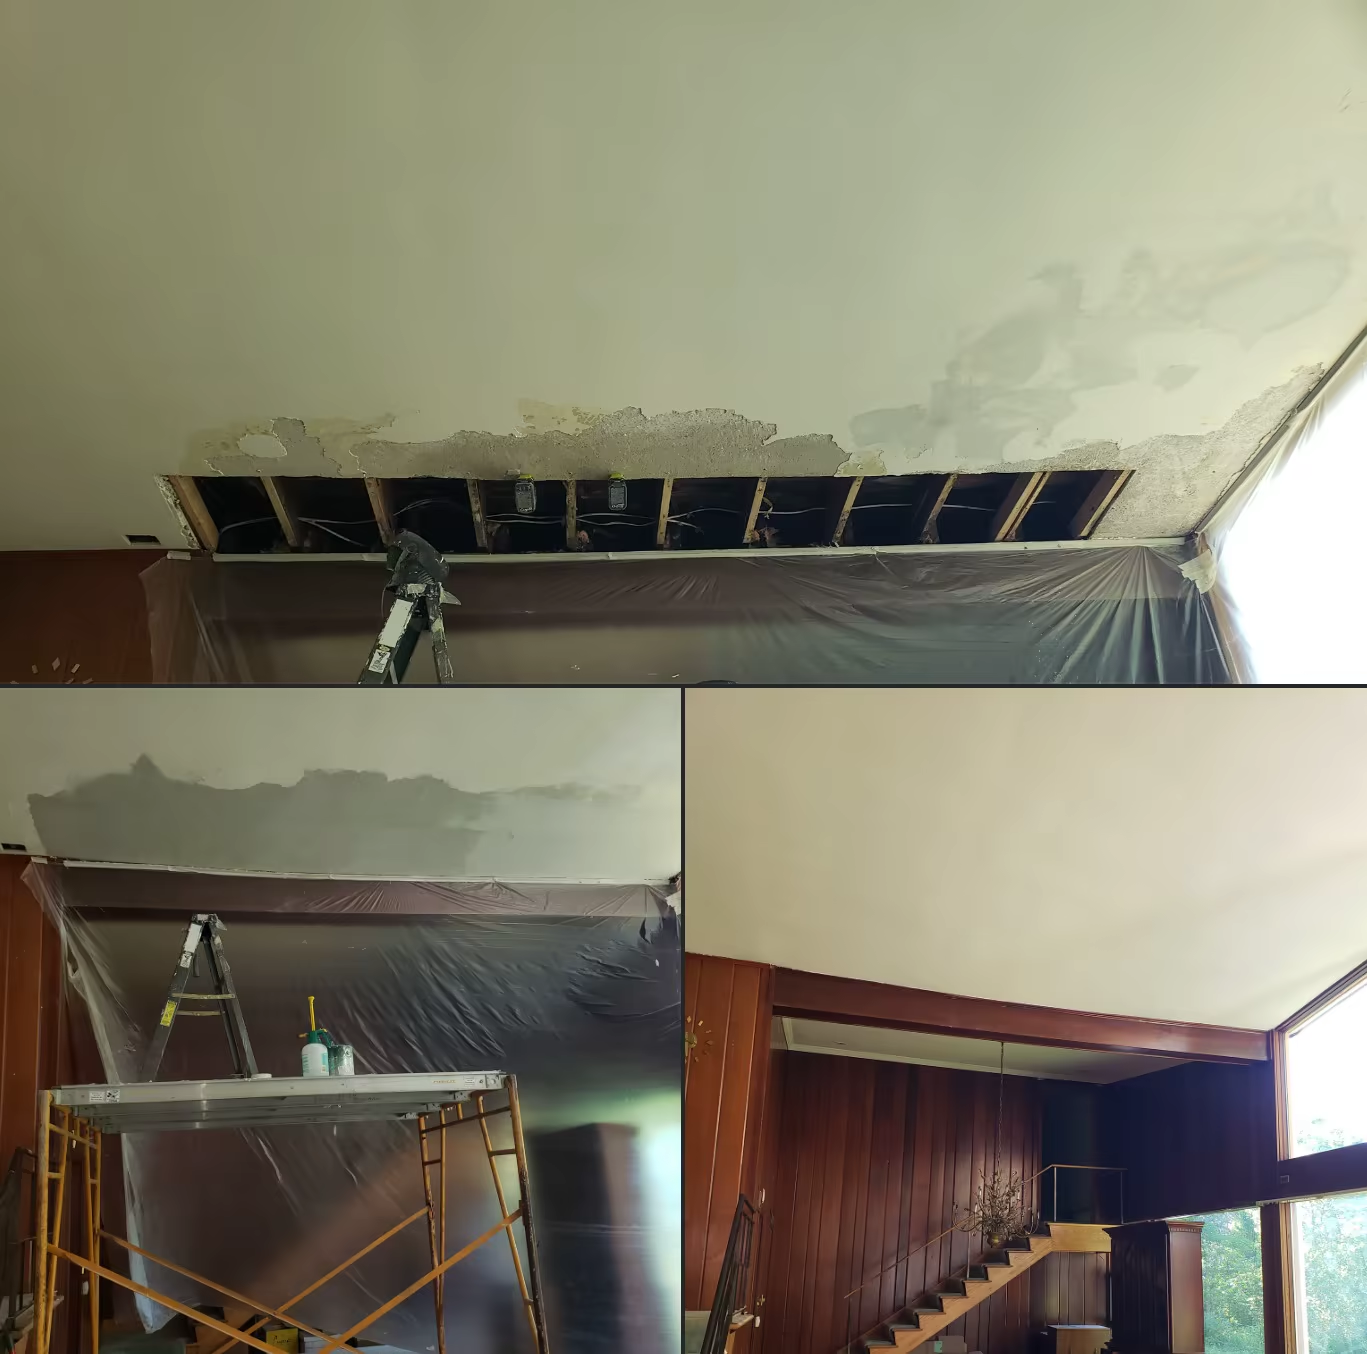
Major water leak in this home. 2 ceilings here, the original plaster ceiling and then a drywall ceiling over the top. It is sometimes cheaper & easier to cover a damaged plaster ceiling with new drywall than fix the damage. However if water damage is involved, the water damaged plaster/drywall should be removed prior to hanging new board.
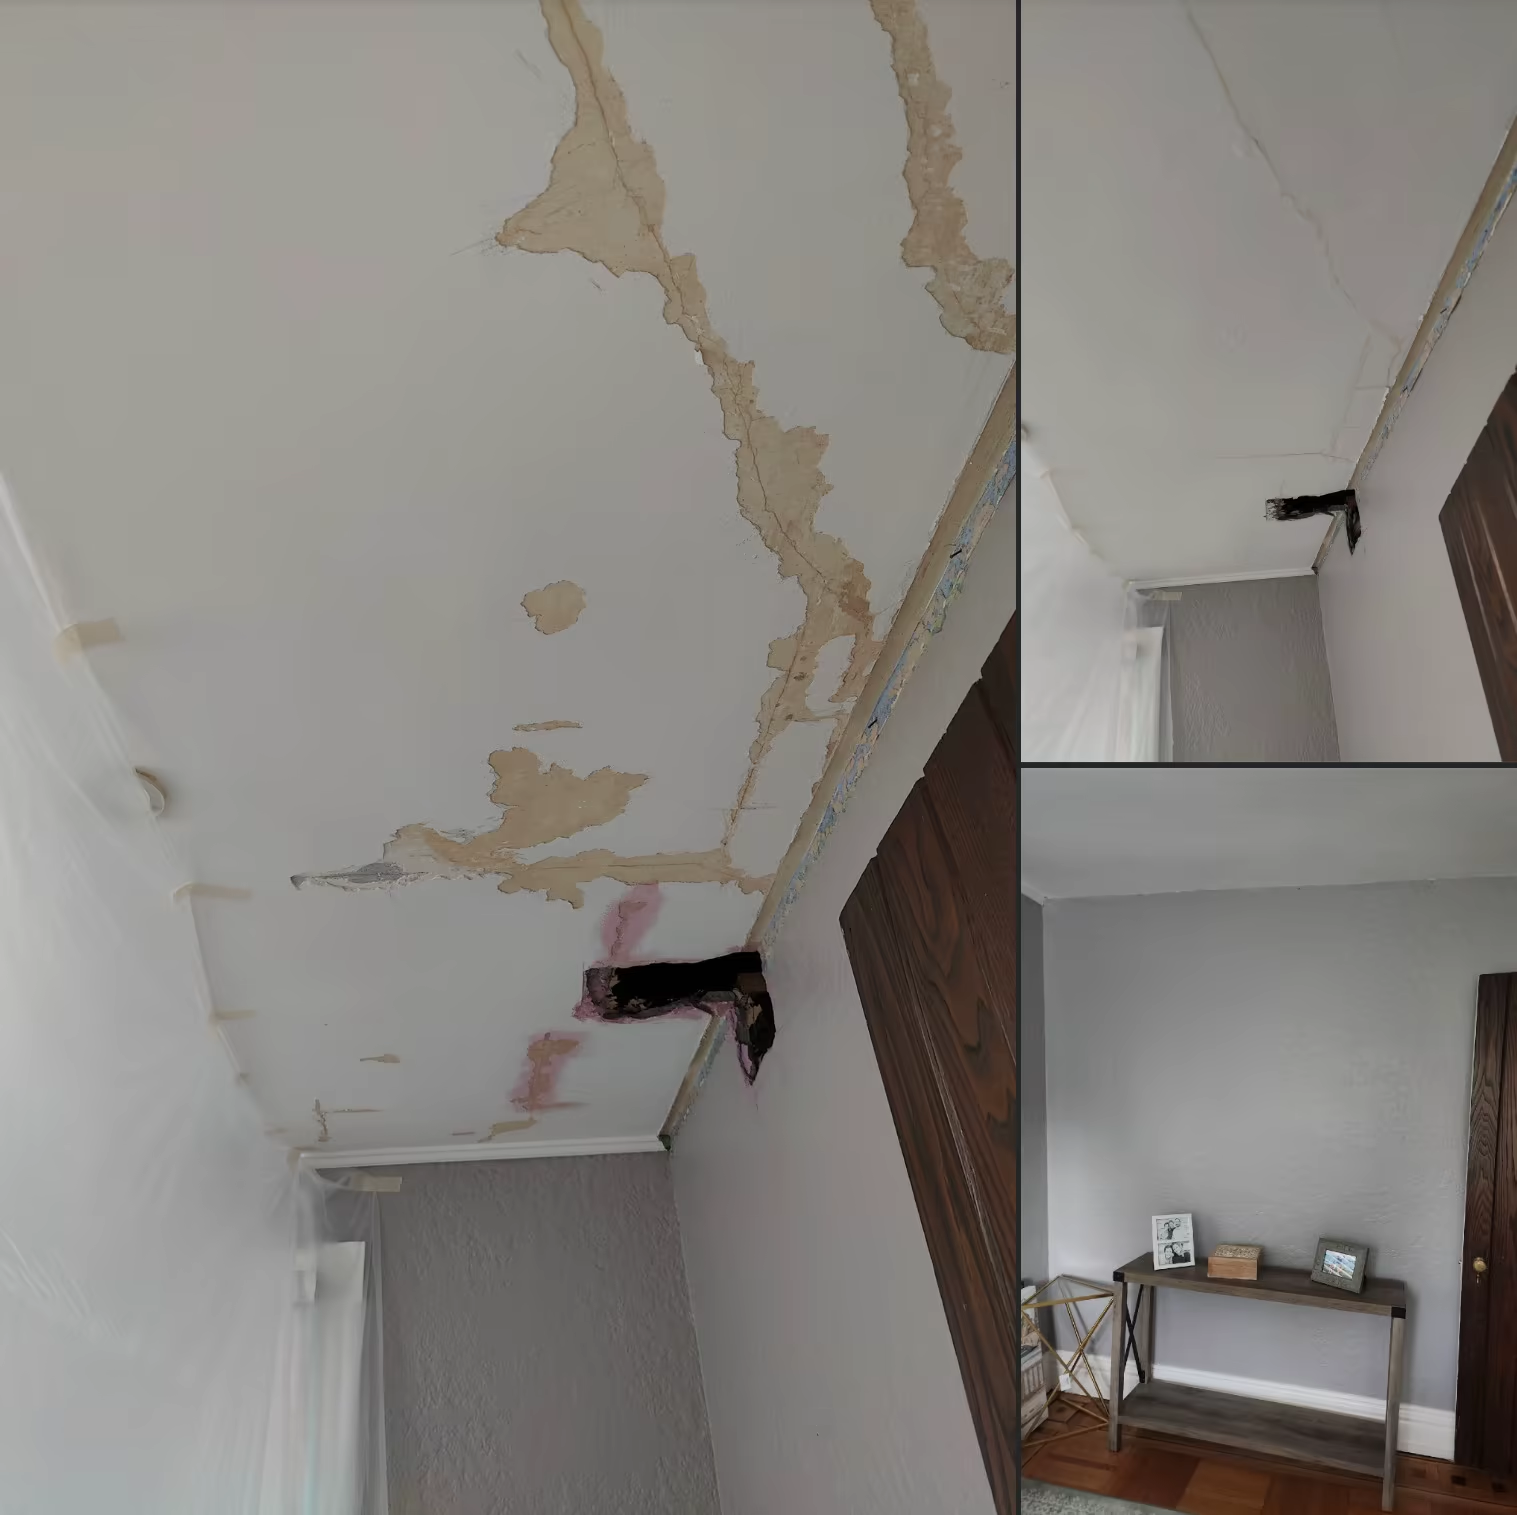
Repaired a plaster ceiling bulge in this Williamsville home. Its important to note, that the size of a plaster bulge repair can increase exponentially onces the bulge is removed. The reason being is that often the plaster keys holding the plaster to the ceiling/wall around the bulge are often broken, necessitating the removal of it as well. The bulge removed in the repair above was 1/3 the size of the patch.
This was the result of a small water leak. The corrosion is called Efflorescence which is a condition where (salt) deposits (in the form of a fluffy white powder) form on the plaster surface. All efflorescence must be removed prior to applying new material or there is a risk of re-starting the chemical process that caused the efflorescencein the first place. White vinegar liberally applied to the surface will often nuetralize the chemical reaction.
Water damage plaster ceiling repair. The only reason we did not open the cracks on this job is because the ceilings and walls in this home are made out of cement. Our attempts to fix the cracks would actually make the situation worse. So we opted to try to hide them instead. This house was a first for us. Its not every day where every tool in your truck used for repair work barely chips the surface!
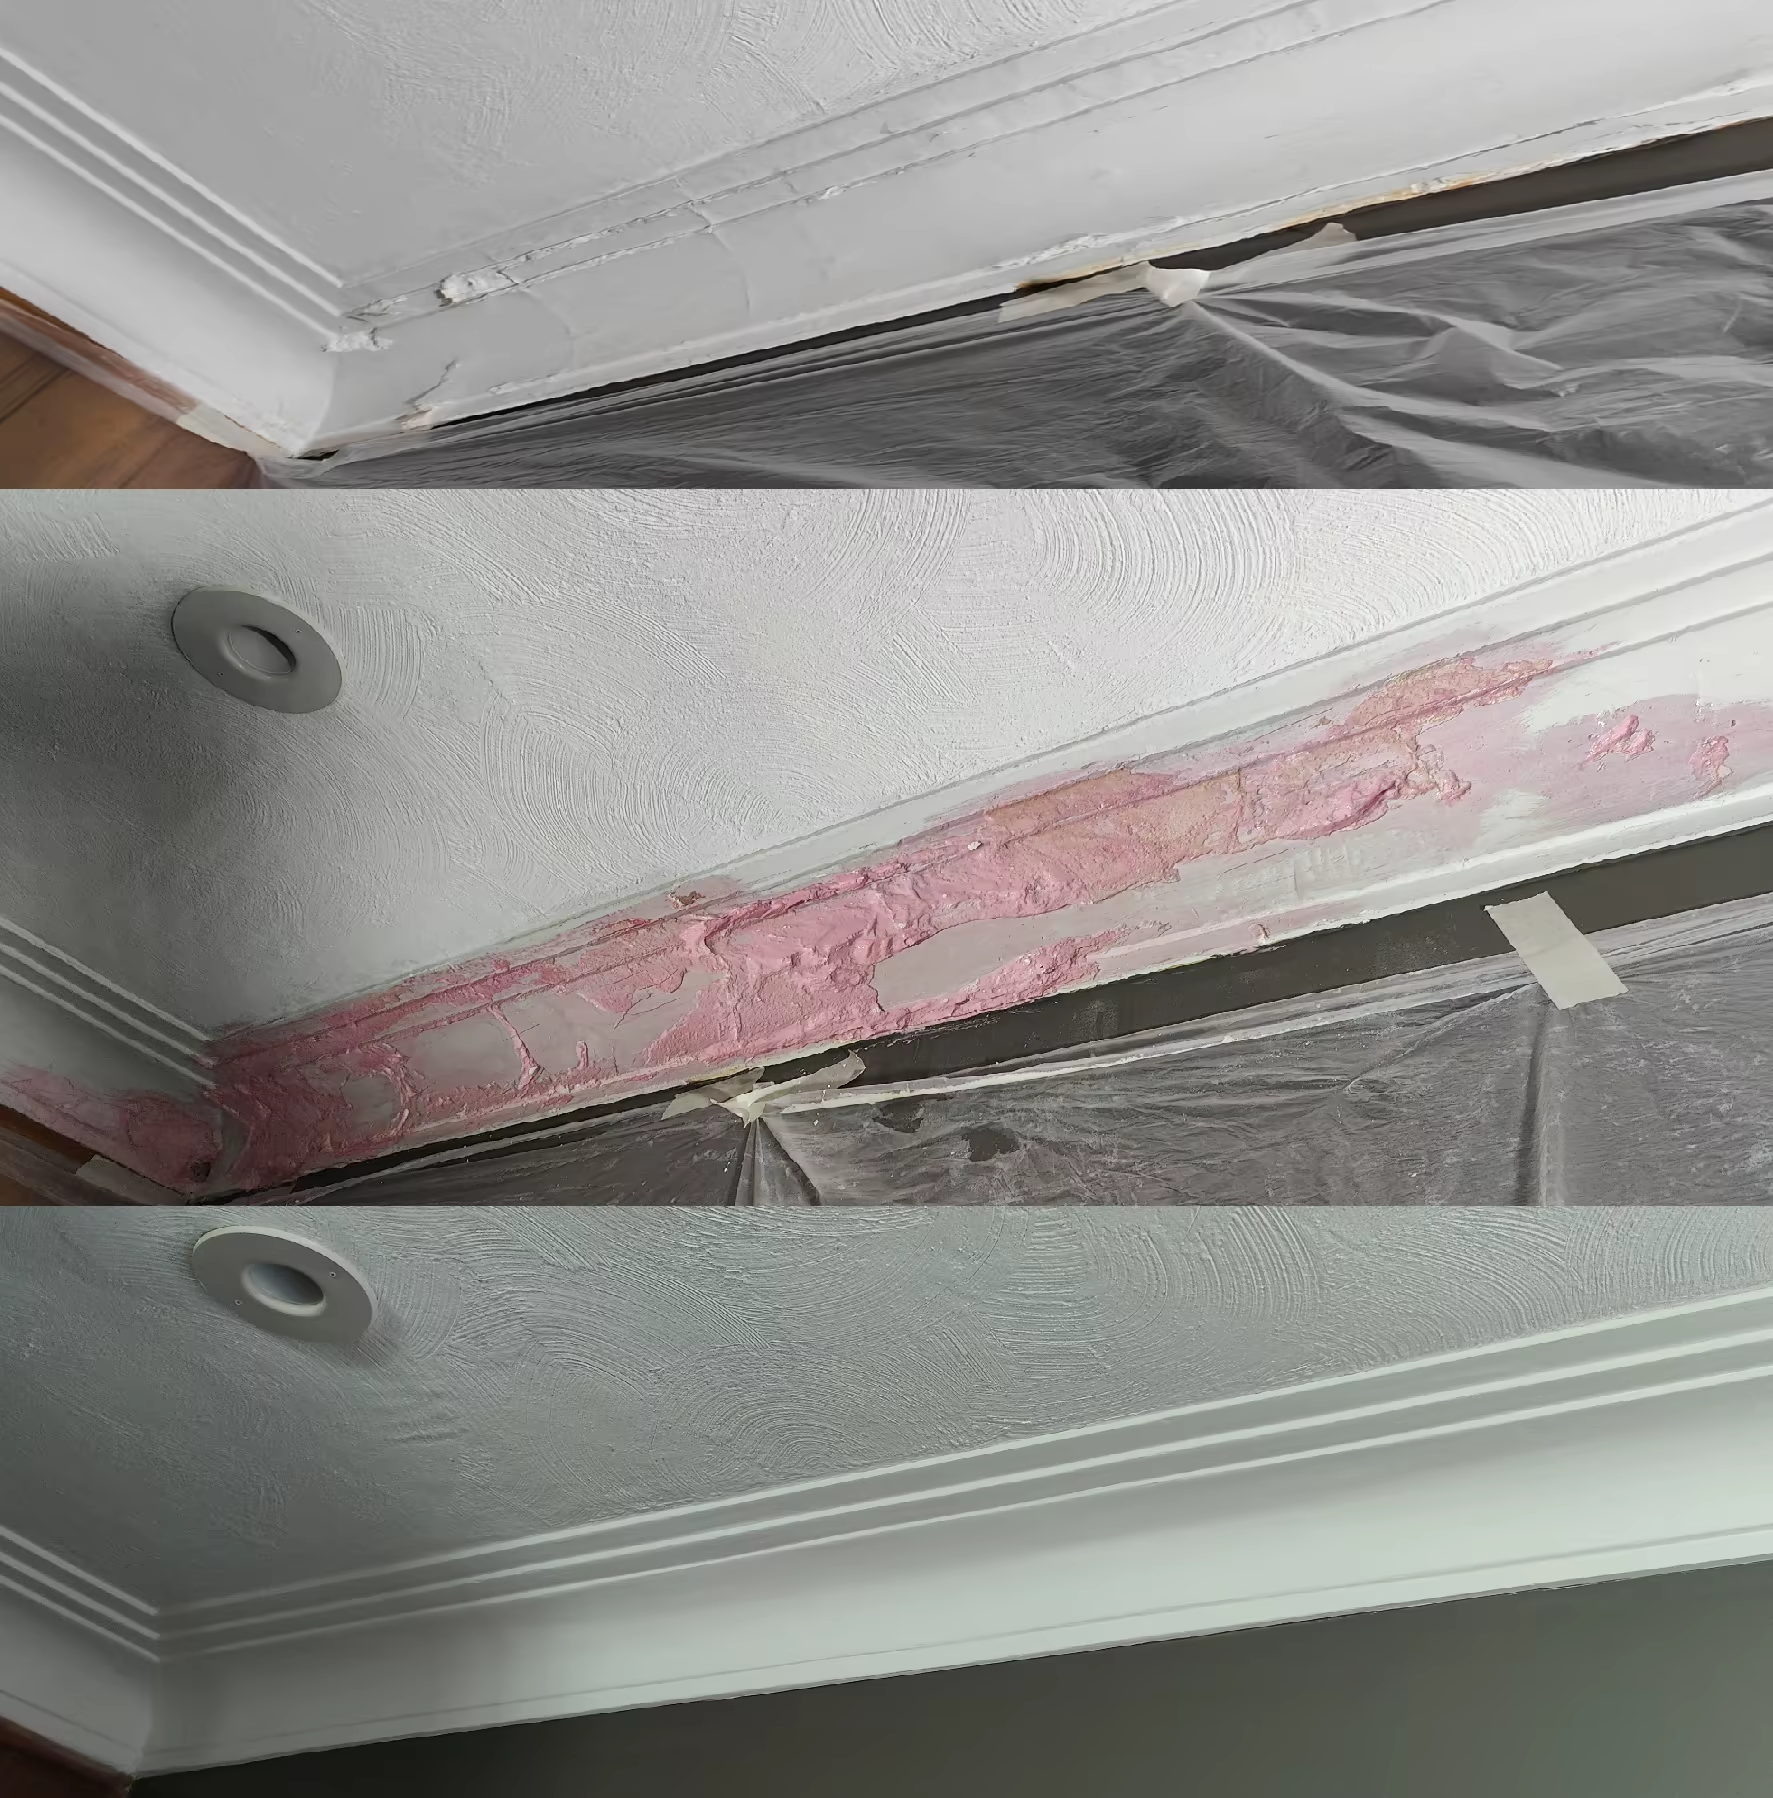
This plaster crown molding was damaged due to a water leak around a chimney. A common location for water damage to ceilings in WNY. We removed the water damaged plaster and rebuilt the crown on site using real plaster. The pink stuff is a bonding agent. It premotes adhesion of the new plaster to the old plaster after its applied. This was the most interesting, but difficult 5 feet.
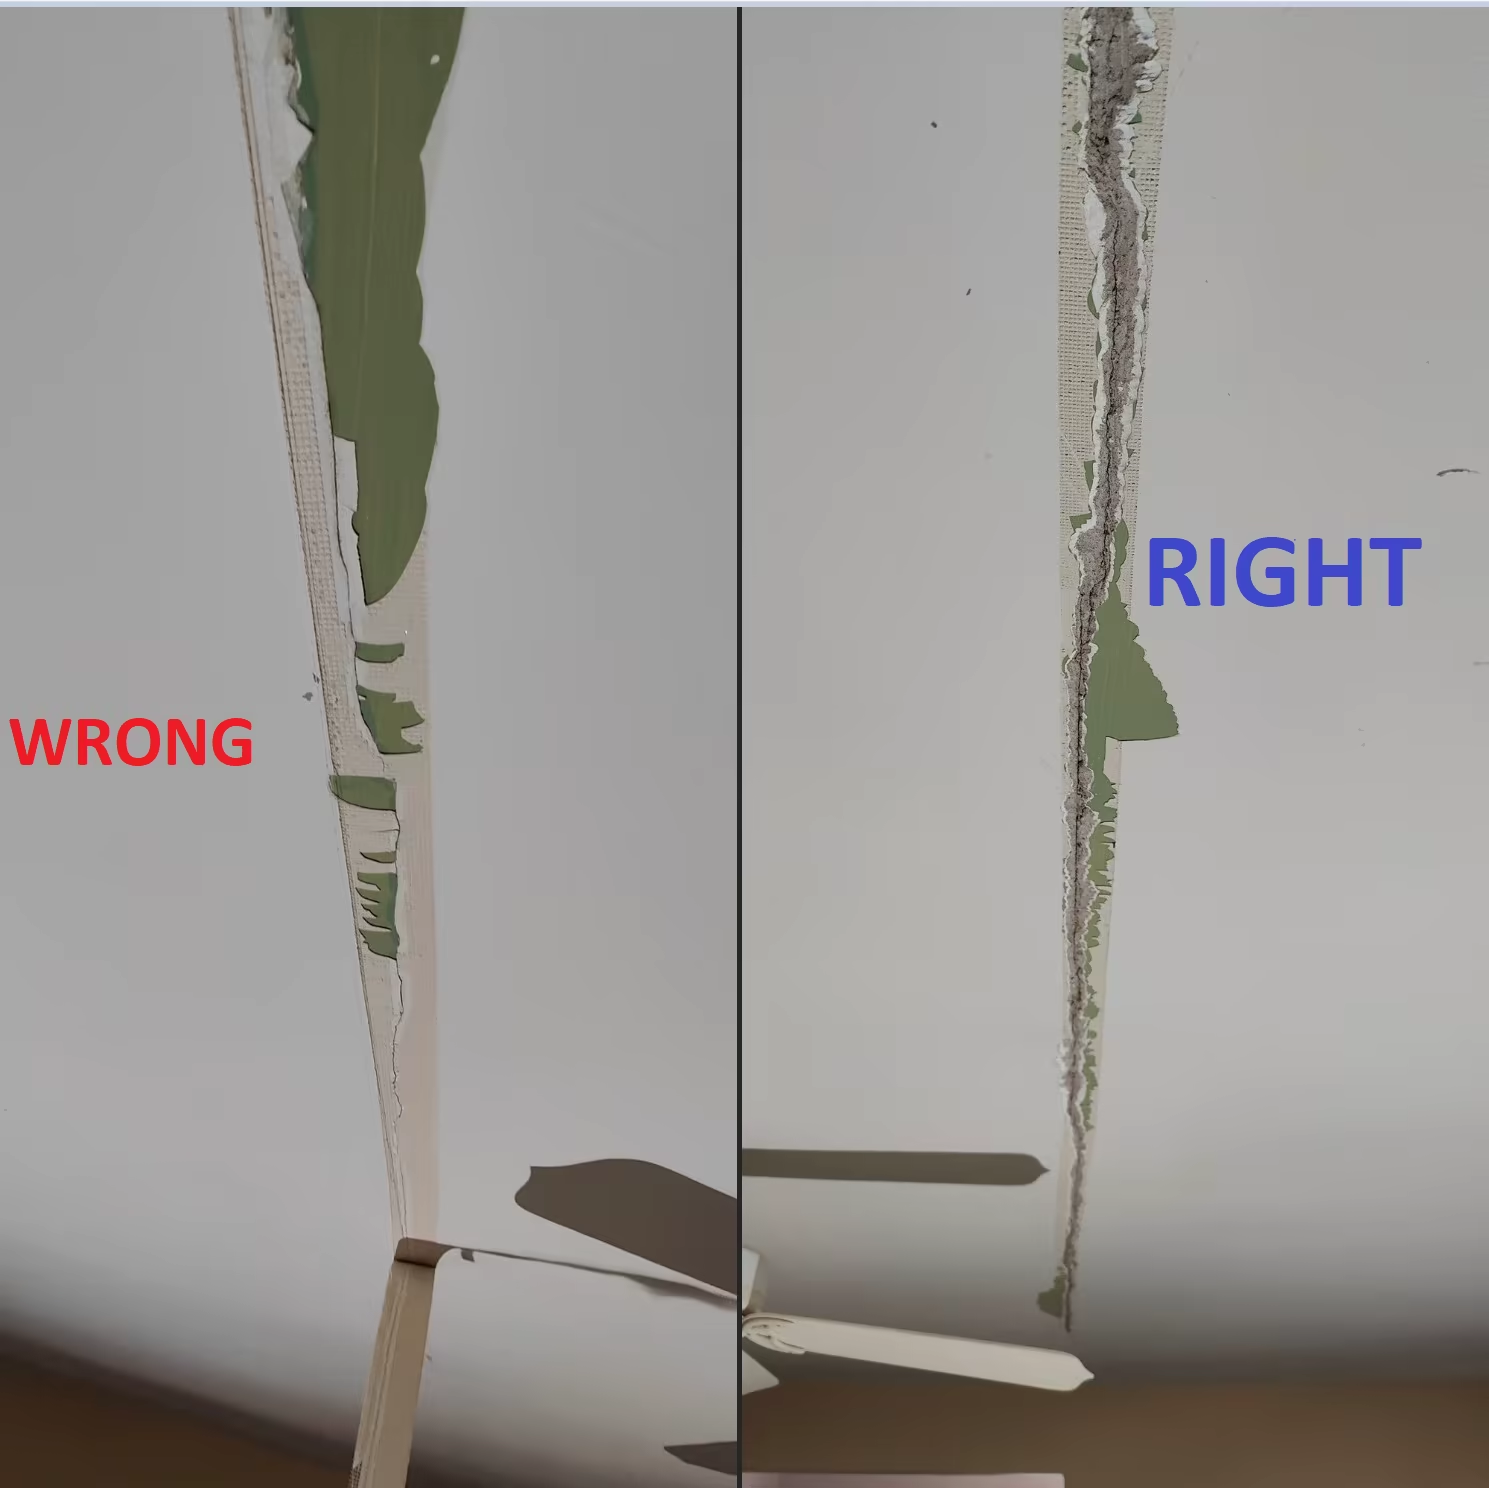
This is an example of how not to fix plaster cracks. The 'repair' on the left is relying completely on the bad adhesion of the ceiling paint. This is an example of a waste of time and money. The plaster ceiling above the ceiling paint (green) is free to move as the previous attempt at the ceiling crack repair does not actually attach to the plaster ceiling at any point. The other mistake, is the lack of material prior to laying the mesh tape.Contrary to popular belief, material will not magically connect on the backside of mesh tape if only applied to one side. -a pet peeveOn the right, we chipped out the crack and opened it up. After this picture was taken, we scraped off the loose paint, and repaired the crack properly. Mesh tape thats installed properly doesn't come off. Or it comes off in pieces!
Which repair do you think will last longer?
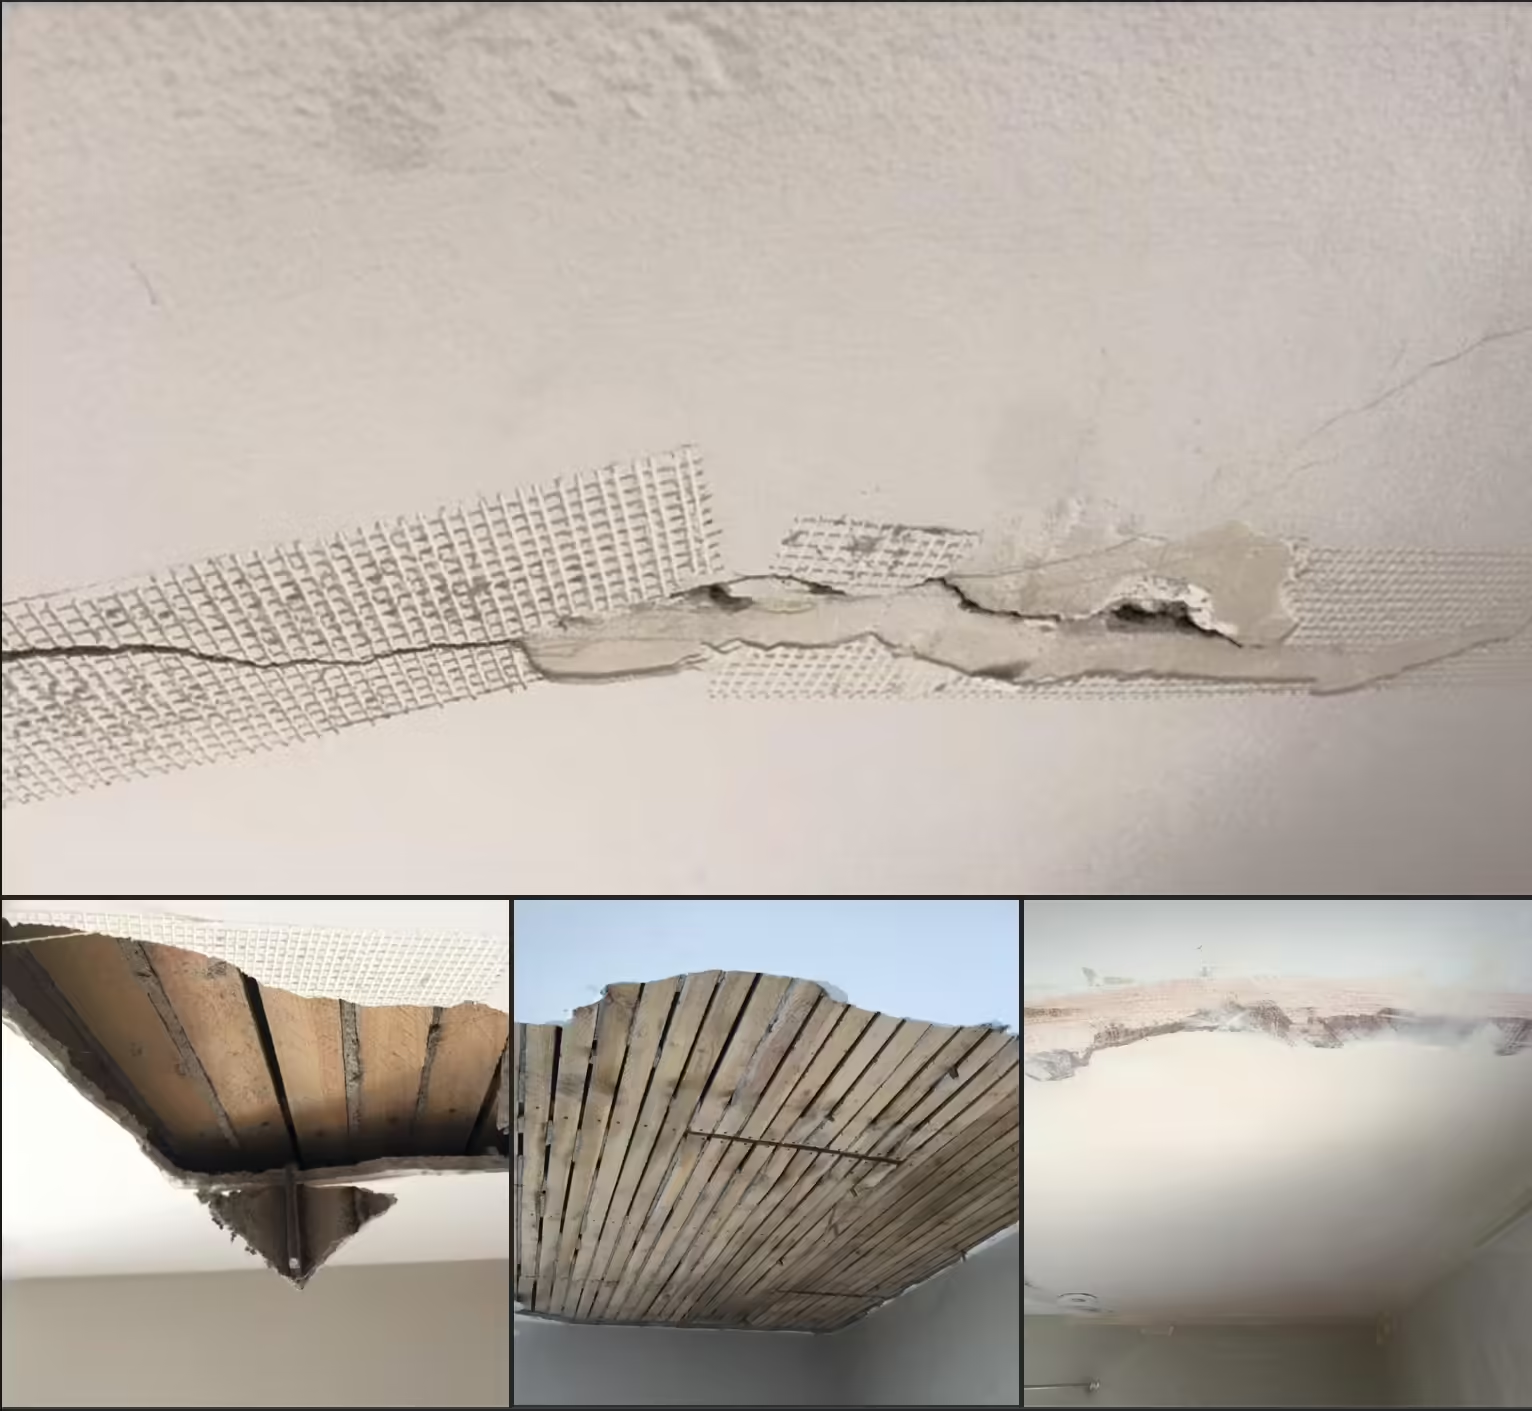
A fairly large plaster bulge on this plaster ceiling that someone else attampted to fix. They laid mesh tape then applied drywall compound over the top. As you can see it held up wonderfully. Unfortunately, this plaster ceiling was no longer actually attached to anything. Once we knocked a hole in it, we removed the rest by hand - no tools! Once the old plaster was removed, we installed metal lath over the wood lath, applied plaster base coat to the metal lath, then applied a lime and Plaster of Paris finish.